
A Dynamic DNS can save you a lot of time, and headaches, when trying to figure out why you can’t access your server from the URL. Although not often, I’ve had several occasions where my ISP changed my public IP address due to restarting/ updating my router or restarting/ changing my DNS server. Fortunately, a DDNS solves this for you by automatically updating the IP addresses on the A records within Cloudflare. So how is this done?
Setting up DDClient
Installation and setup is real easy on Debian based operating systems. We will need to install two packages: ddclient and Perl module for IP validation.
sudo apt-get update && sudo apt-get upgrade -y
sudo apt-get install ddclient libdata-validate-ip-perl
Running the command above will open an installation wizard. Skip through the entire prompt (we will configure our file later). For DNS Service Provider, select “other”, and for Dynamic DNS update protocol select “dyndns2” (its the first entry). Now we will configure the dynamic part of the DNS, in terms of seconds. Type:
sudo dpkg-reconfigure ddclientSelect “No” for Run ddclient on PPP connect? Select “Yes” for “Run ddclient as a daemon? Leave 300 (seconds) for the default time for the Interval between ddclient runs question.
We want to keep the interval at 300 because ddclient will throw soft errors for anything faster than that. Once its all setup, and the high of a newly configured app passes, you won’t notice any delay at all in updating your domain anyway. Other DDNS clients will send out packets almost every second, which just adds unnecessary traffic.
Configuring the /etc/ddclient/ddclient.conf
Use the following command to open up your DDClient configuration file.
sudo nano /etc/ddclient/ddclient.conf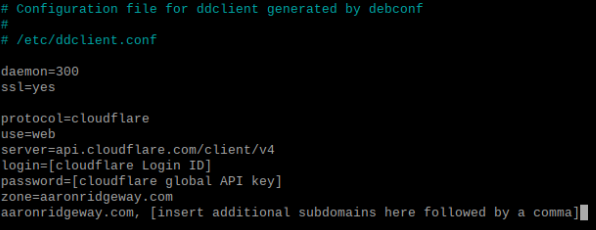
Setup your file the same way, modifying the sections with the [brackets].
- login= enter your login credentials to get into Cloudflare.
- password= enter your Global API key here. You can find your Global API key by clicking on “My Profile” in the top right of Cloudflare, and then by clicking on “API tokens”.
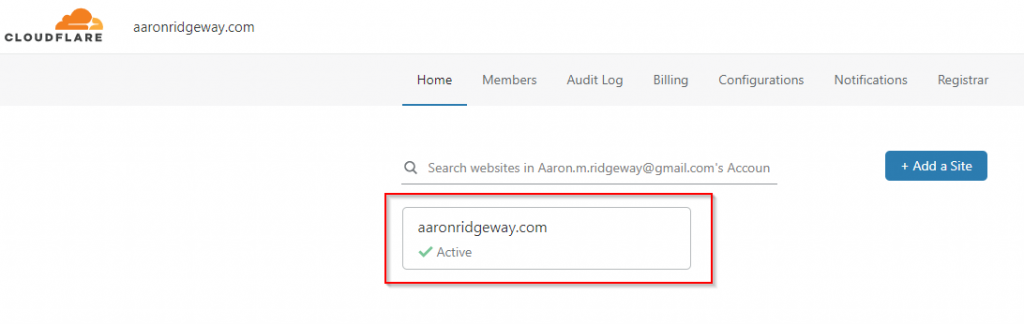
- zone= type in the cloudflare zone you want to update (see below).
- Enter the A records that you would like to update on the last line.
Testing the Connection
Testing your Public IP
sudo ddclient -query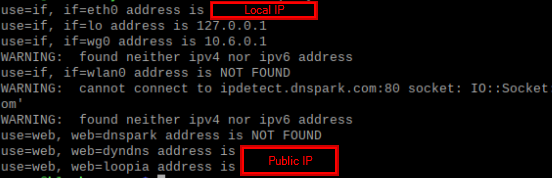
Confirm that both the Local and Public IP addresses are accurate. To confirm the Public IP address, you can type “what’s my IP” directly into Google.
Testing your connection to Cloudflare
sudo ddclient -daemon=0 -verbose -noquiet -force
You will get a lot of text but at the end of it you should a message similar to:
SUCCESS aaronridgeway.com — — Updated Succesfully to [PUBLIC IP Address]”
Validate that DDClient is running every 5 minutes
To do this, run the following command
htopThat command shows all of the processes that are currently running. Check the list for ddclient. If you don’t see it, you can search for it by pressing F3.

If you see ddclient in your list, then sucess! You’re all set up with DDClient and Cloudflare!
Additional notes
Adding new subdomains to DDclient
Its a quick 2 step process!
- Update the ddclient.conf file with the new subdomains on the last line of the file.
- Force an update to skip the wait!
Forcing an update
There may come a time when you need to manually update your IP address, for either troubleshooting or to add a new site to be managed.
sudo ddclient --forceHelpful references
- https://sourceforge.net/p/ddclient/wiki/Home/
- https://jacobjangles.com/free-ddns-using-ddclient-and-cloudflare/
- https://blog.jswart.xyz/posts/cloudflare-dynamic-dns/
- https://mirrormirage0.medium.com/configuring-dynamic-ip-auto-update-for-custom-domain-name-alternative-to-dyndns-noip-etc-57a1e100efd5