
Are you tired of being bombarded with ads that are congesting your network? Have a spare raspberry pi laying around collecting dust? Well we can fix that! Pi-hole is a free little tool that packs a powerful punch in the ad space. With just 5 minutes, you can deploy network-wide ad protection that blocks those pesky ads in all devices and apps.
Supported Operating Systems
Currently pi-hole is only supported on the operating systems listed below.
- Raspberry Pi OS (formally Raspbian) Releases: Stretch and Buster
- Ubuntu Releases: 16, 18, 20
- Debian Releases: 9, 10
- Fedora Releases: 31, 32
- CentOS Releases: 7, 8
Required Hardware
The required specs for pi-hole are really quite minimal. Perfect for a small VM or an old raspberry pi.
- Minimum of 2GB of free space (4 GB is recommended)
- 512 MB of RAM
Installation
Installation is real simple. Run the following command in your terminal window to start the download and installation:
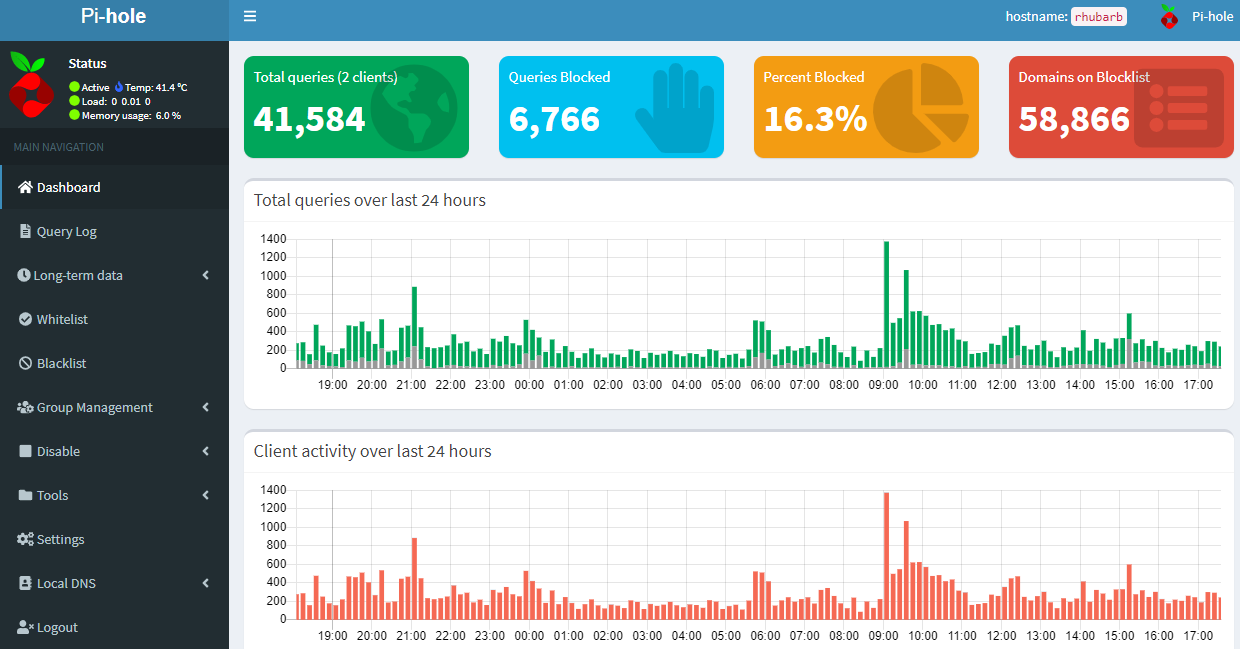
curl -sSL https://install.pi-hole.net | bashI recommend keeping all of the settings default, except for the DNS provider section. By selecting the default setup, you will be effectively blocking almost 59,000 different types of ads!
Recommended Upstream DNS Providers
The pi-hole team does a great job at breaking down the different DNS providers available. My personal favorite is Cloudflare DNS as it is currently the fastest provider out there that does not log your IP address. The default DNS addresses are:
- 1.1.1.1
- 1.0.0.1
- 2606:4700:4700::1111 (IPv6)
- 2606:4700:4700::1001 (IPv6)
Additionally, cloudflare offers DNS for families which can block malware and adult content. I posted a link in the additional resources section if you’re interested in learning more about these alternative servers.
Setting the Admin Password
Out of the box, the admin password is not set for the web interface. To do so, type the following command. This will allow you to log in on the next step.
sudo pihole -a -p
Accessing Your Pi-hole Server
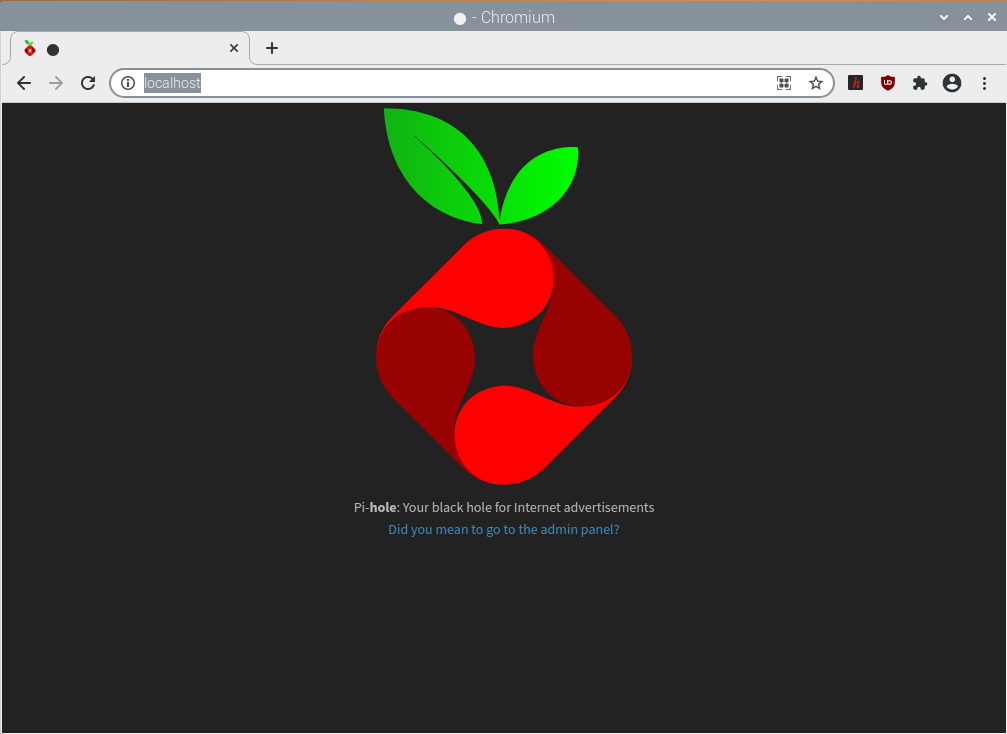
You can access your new server two ways: web browser, or in your terminal window. To access via the web browser, type localhost into the URL bar and the screen below should appear. Alternatively, access pi-hole via the IP address of your device. If that doesn’t work, then see the Troubleshooting notes section below. Click on Did you mean to go to the admin panel? to view the the graph at the top of the page. You can login with the password you just set in the previous step.
To access the server from the terminal, type in the command below. This will tell you if your server is working correctly.
pihole status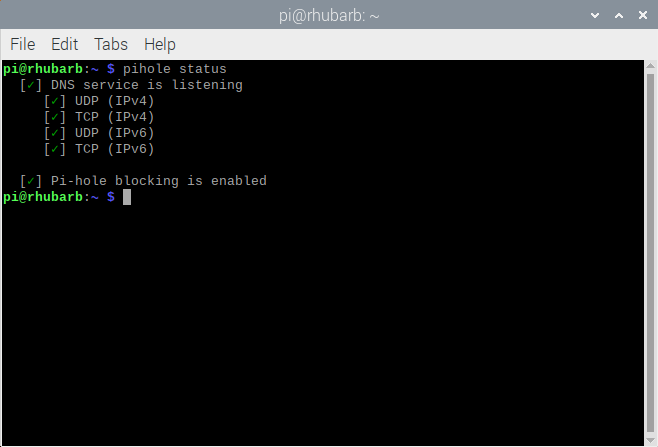
Now let’s start passing your traffic through the server.
Configuring your router
Configuring your DNS
Type 192.168.1.1 into your web browser and login with the credentials to your router. If you don’t know the credentials, you can google search the make of your router for the default username and password combination. Chances are it will either be admin and admin, or admin and password.
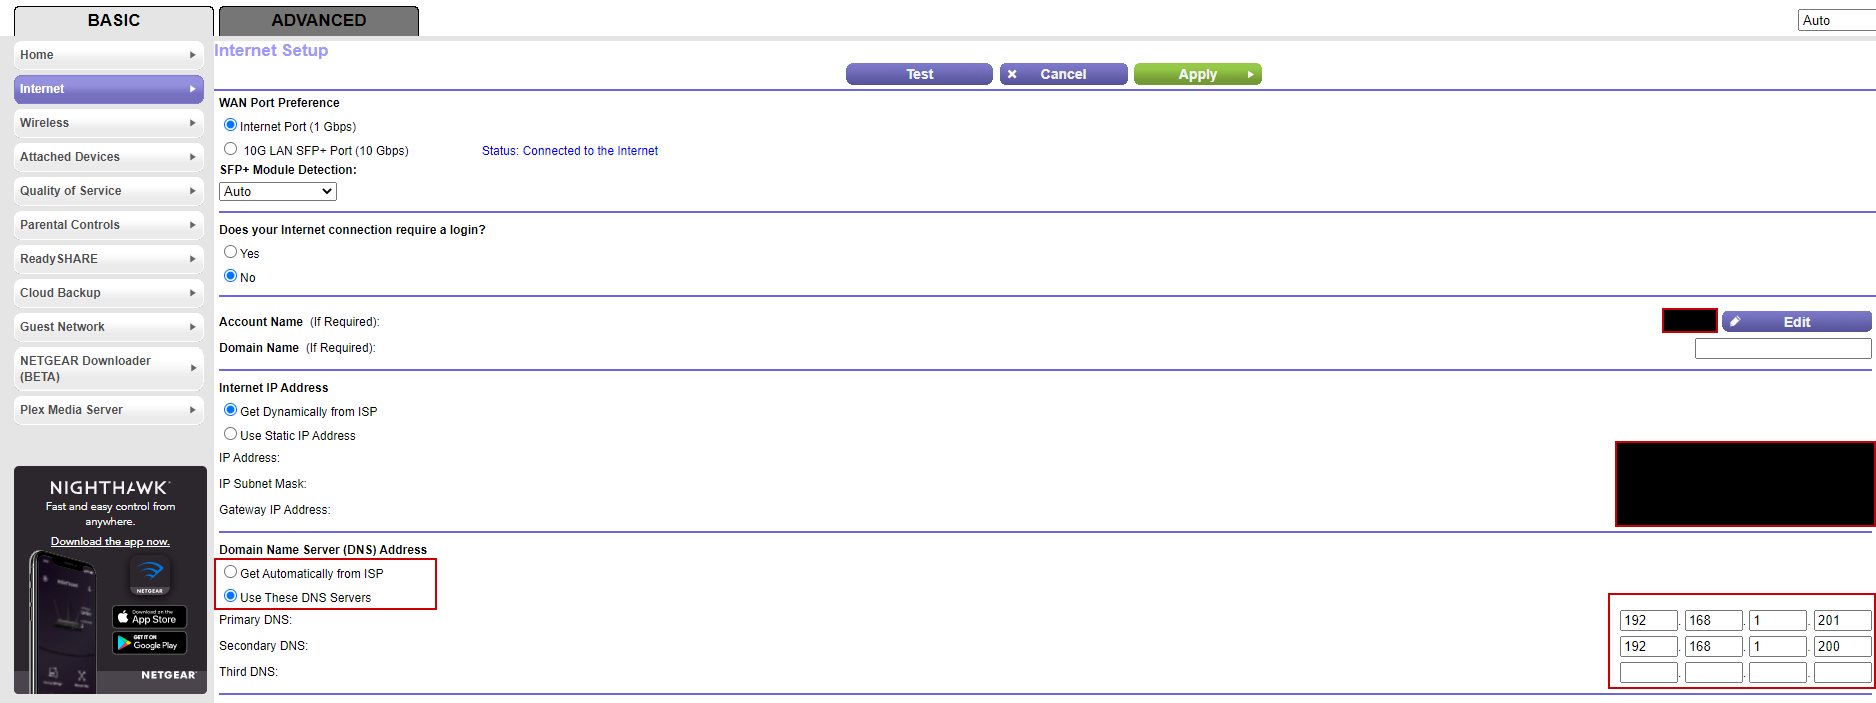
Once in, navigate to the Internet tab, and scroll down to Domain Name Server (DNS) Address. It should look something like below. Switch the radio button to Use These DNS Servers and specify the IP address of the device running pi-hole. In my screenshot, I happen to be running two pi-hole servers for redundancy, for which I used the primary and secondary fields. Once you have made those updates, hit Apply.
Reserving your device’s IP address
Reserving your device’s IP address will save you a lot of headaches when you’re trying to figure out why you no internet. If you have DHCP enabled on your device, you are allowing your router to assign IP addresses to your devices. This prevents you from needing to assign an IP address to every device on the network, and constantly manage which IP addresses are used. What this means for your device is that, upon a power cycle, it will receive a new IP address. Since we assigned the device as your router’s DNS in the previous step, this can’t happen as it will break the pathway for DNS queries. Fortunately, we can reserve the IP address to prevent an outage!
- Navigate to Advanced => Setup => LAN Setup
- Click Add within the Address Reservation section to begin reserving an address.
- Select your Device in the table and click Add
That’s it! You have installed pi-hole, routed all traffic to your device, and reserved its IP address.
Troubleshooting Notes
Can’t view the web server? You might have a potential port conflict
If you’re unable to view your server from the web browser, then chances are another application is using the same port as the lighttpd service. To validate this assumption run the following command.
sudo netstat -tulpn | grep LISTENIf you see a conflict, then you can edit the lighttpd service port in /etc/lighttpd/lighttpd.conf. Some recommend also adding it to the /etc/lighttpd/external.conf as well but that’s optional. Once done, run the following command and you should be able to access the web server by typing in localhost, or the IP address, and appending the port to the end.
sudo systemctl reload lighttpdRun the debug command
If all else fails, run the debug command to get a verbose read out of everything going on to troubleshoot further.
pihole -dAdditional References
- https://pi-hole.net/
- https://blog.cloudflare.com/introducing-1-1-1-1-for-families/